VINYL CUTTER TUTORIAL (USING MODS)
We use Mods on Ubuntu for operating the vinyl cutter (as well as the 2 Modelas).
We keep a small supply of general purpose vinyl rolls in a few colors, for interior use. Many other options are available online.
Remember that the vinyl cutter uses a tiny drag knife to cut material that must remain sticking to a backing - these are basically just
stickers being cut, so they need good adhesion to the backing, in order to not shift around and/or get torn up as the machine works.
You can transfer adhesive sheet material to a different backing, if the original backing doesn't hold up well for
vinyl cutting - but it will always need to be tested, and
the machine can never cut all the way through any sheet material.
There's also a limit to the thickness of a material that the tiny knife can reasonably handle - we've tested 25 mil silicone masking (for
sand blasting stencils), which works - but there is deformation of the curves cut at tight corners. See below for photos and more detail.
To start, have a black & white PNG ready - scaled correctly, and between 300-600 dpi (background space counts as part of image size - crop any excess
margin)
Copy/paste your file to the documents or downloads folder (get in the habit of avoiding working on any shop computer directly from USB or from desktop)
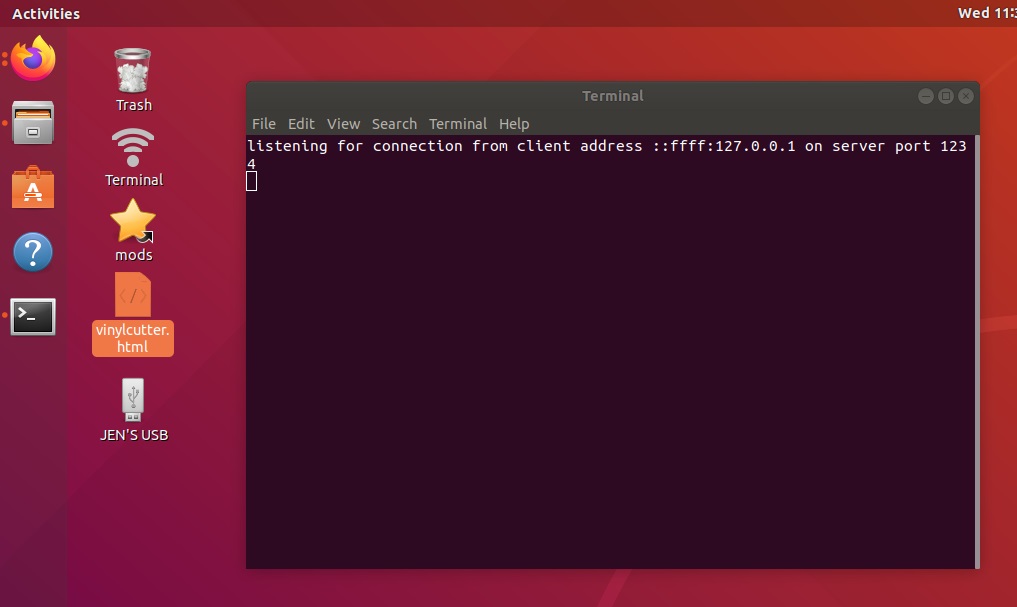
Double-click the terminal link on the desktop - the terminal window should open and say "listening for connection"
If the terminal desktop shortcut doesn't work, you can open the connection without it - it's just a convenience that opens a terminal window and
runs a command that you can do yourself -
(taken directly from regerohan's 'setting up mods in Linux' page) -
Open a terminal window in the 'js' folder (in Linux just right-click anywhere on the space (not on a file) in /mods/js and open a terminal window there), and type -
node deviceserver.js 127.0.0.1 1234
or
node deviceserver.js ::ffff:127.0.0.1 1234
IPv6 is preferred
Click on the open button on the device module, the port is opened.
Checking the terminal, we can see that an incomming connection is accepted.
If you get an error, you can try using the IPv6 address (::ffff:127.0.0.1).
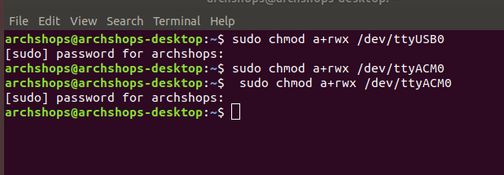
Or if it is a permissions issue-related error, try this first -
sudo chmod a+rwx /dev/ttyUSB0
(or lp0, lp1, lp2... whichever connection the machine is currently on)
The password is the same as the username (just read your terminal command line for a reminder)
That setting is meant to be permanently added, but it hasn't been sticking after restarts, so if you can't connect, do try it.
Double-click "vinyl cutter" local html link on the desktop - this opens a saved local version of the mods site with edited settings
(mods.cba.mit.edu defaults may not have all the correct settings)
(svg is vector - if you have one, choose that instead)
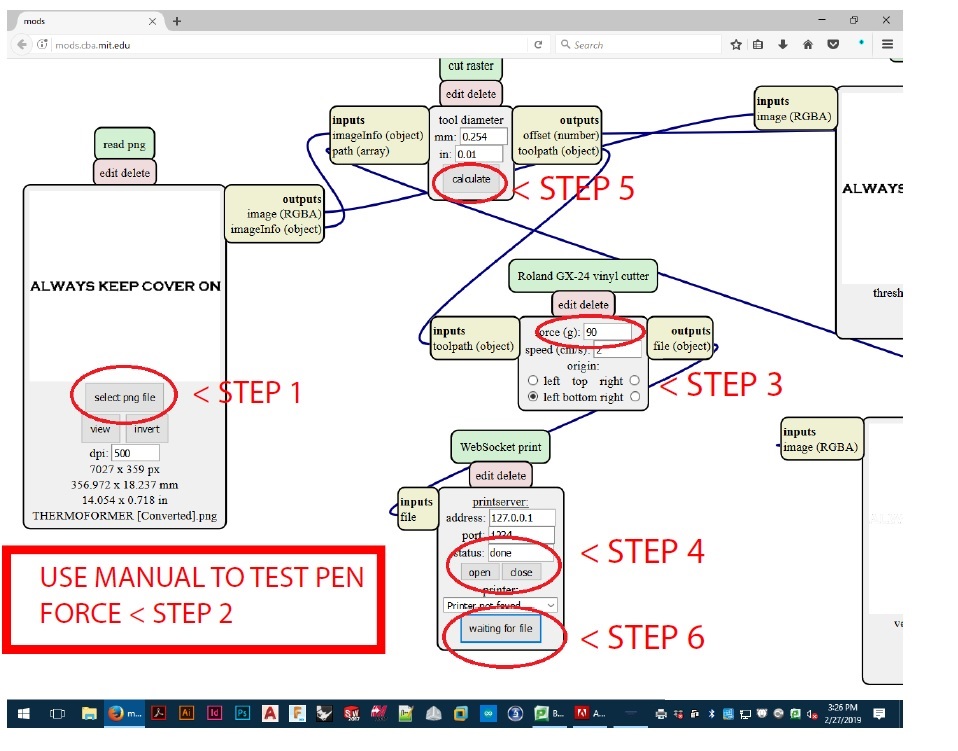
 1. -
1. - On upper left, click "select PNG file", and open your png
Under select/view/invert buttons, you can change the DPI. This will change the image size (displayed underneath)
You can make your image smaller without losing quality - but enlarging it will distort the edges. An excessively large
file can crash. So set size/dpi carefully
before saving the png, rather than editing here, if possible.
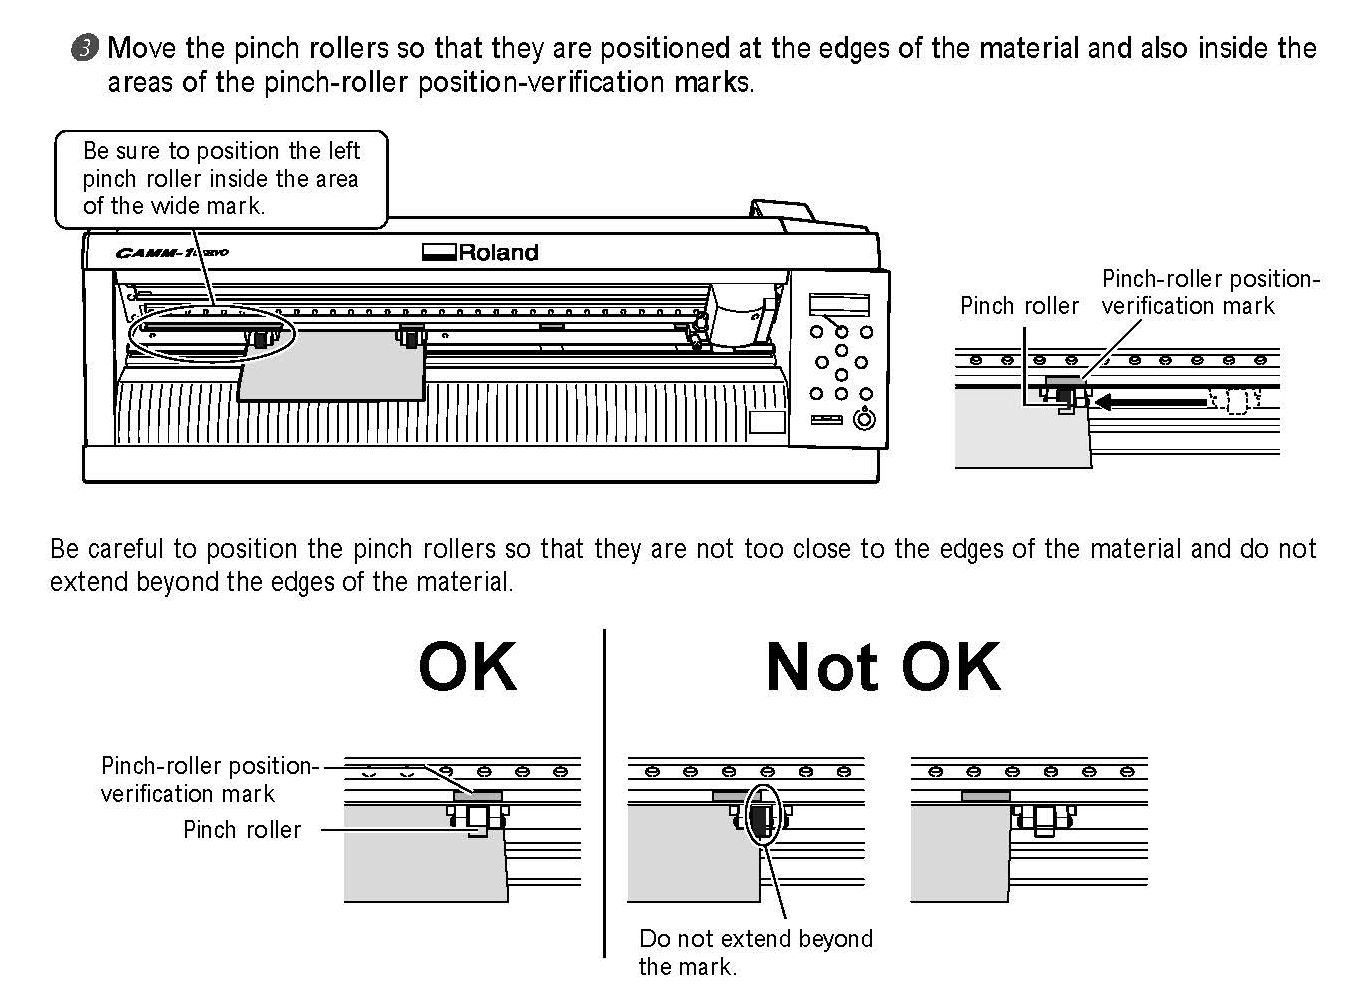
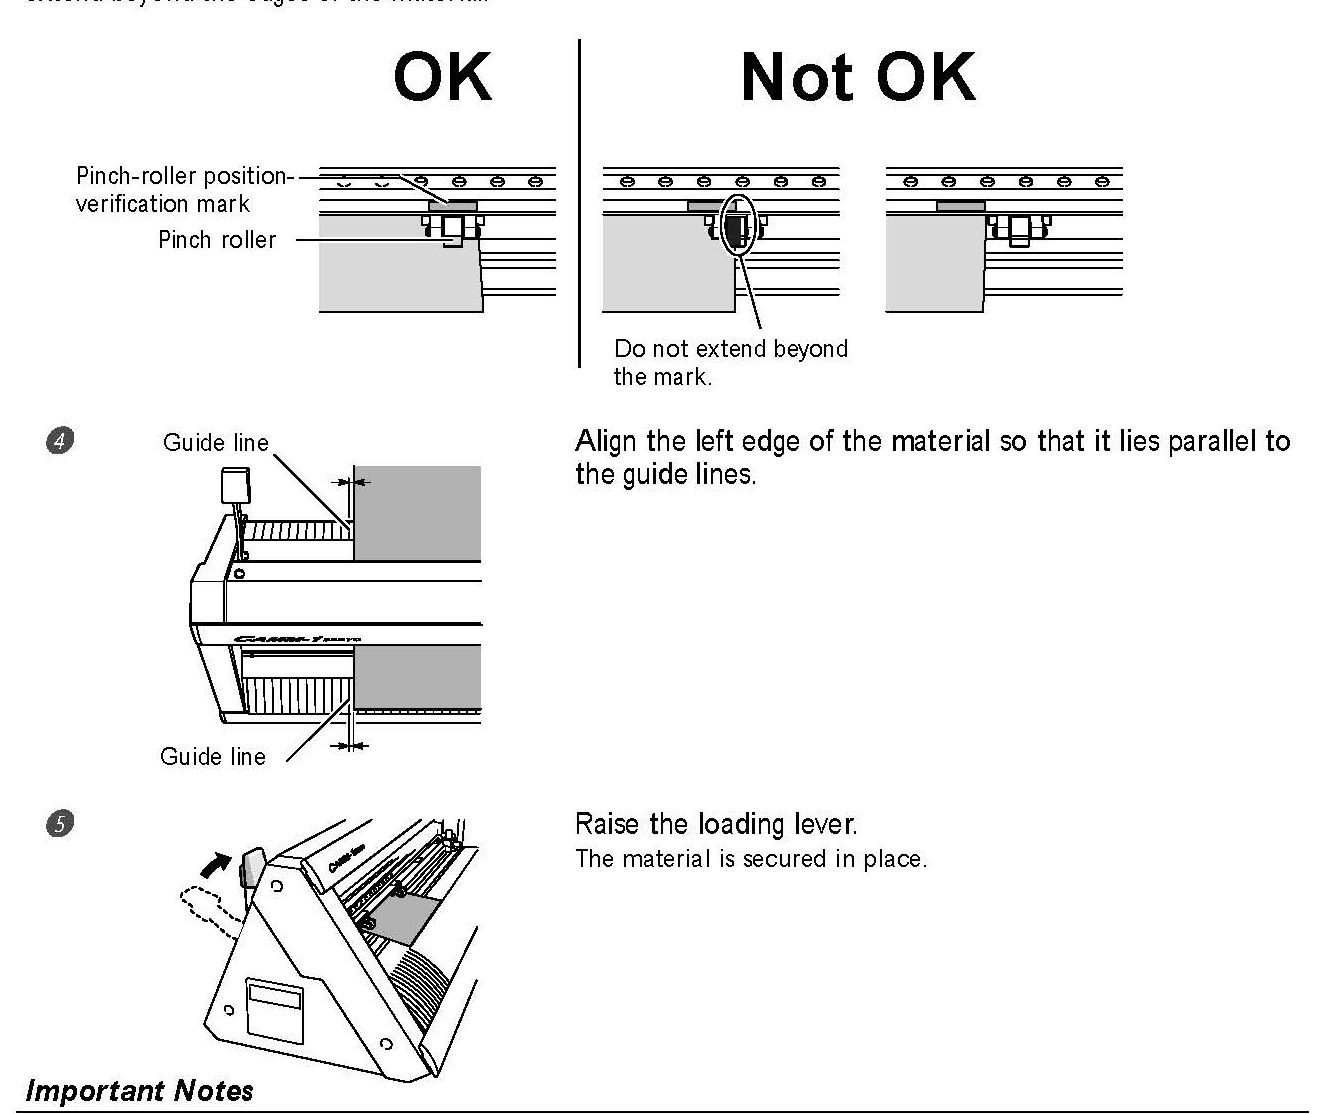
2. - Use Roland GX-24 Manual instructions (Ch. 4-6) to set up and test the material/pen force

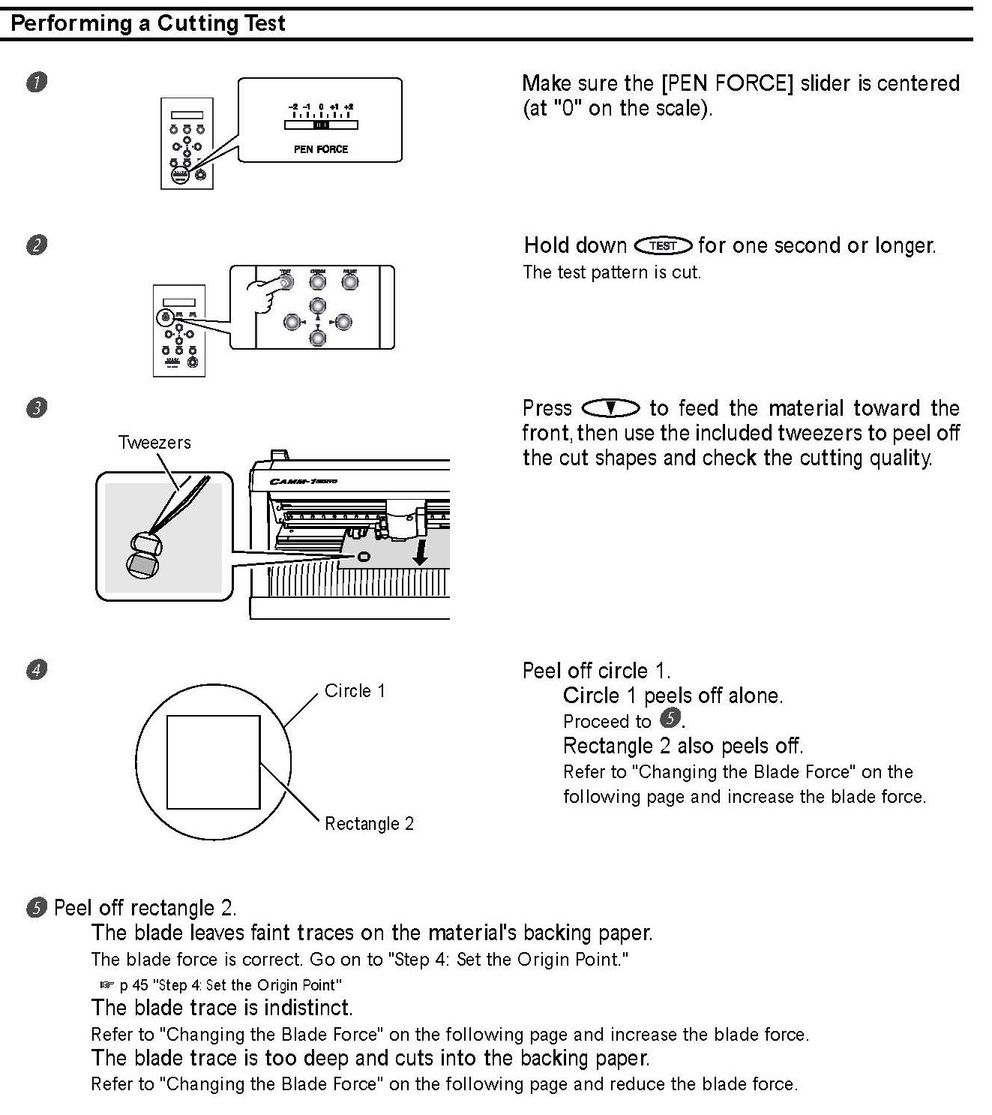
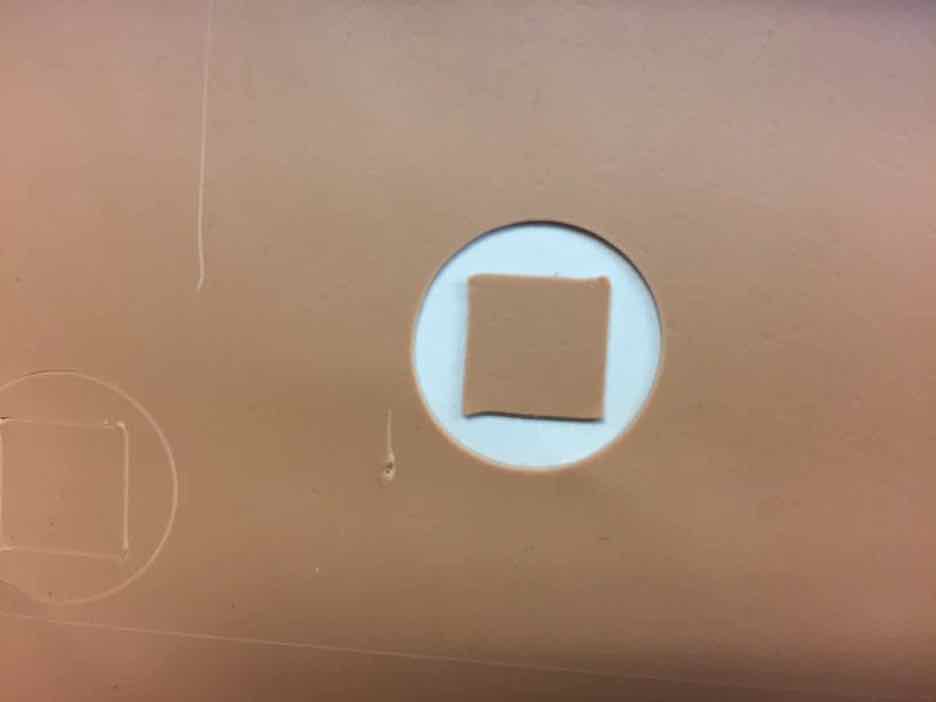
The goal of the test is to peel off the circle and leave the rectangle. If the gram force is a bit too light, the
corners of the square are likely to stay attached. If the gram force is too heavy, it will groove the backing paper
(which can rip entirely - you just want enough pressure to cut through the vinyl and nothing else).
When the machine 'reads' material, it will display the printable width - make sure your image will fit inside this width! If it will not,
you can scale it down by adjusting dpi in the mods window. Don't attempt to increase speed past 2 on this machine, or on the Mods setup.
3. - Start the general purpose vinyl with 90 gf settings, and keep the manual slider on the machine at zero to start - only use it for minor
adjustments after initial testing
Hold down the 'test' button to cut a test piece - this is explained in the manual
Edit gf (pen force, in grams) in Mods window to match, after testing
4. - Make sure the printer - computer connection is open (terminal window open, says "listening for connection"
Check the command prompt window - if it doesn't say "listening for connection or "connection accepted", then close and reopen it in the Mods
'websocket print' window (make sure status says 'open'). If there's an error message, check terminal window again, and also check cables and
make sure the machine is plugged into the computer
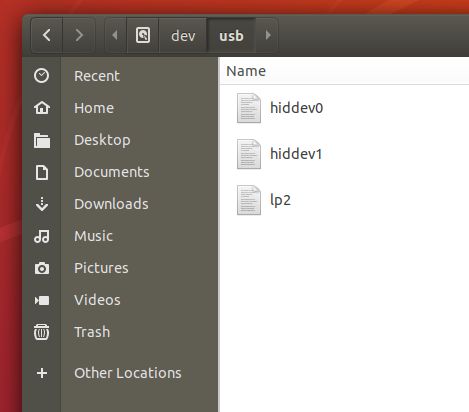
If permission is denied, or there's another connection error, you can check which usb port (lp0, lp1 etc) to use in the /dev folder-
navigate to "other locations"- "computer" - "dev folder" -
"usb folder" and see what's there, to make sure mods is looking for the machine in the correct place (lp number may change when things
are disconnected/reconnected)
If it is correct, but permission is denied, open a terminal window (right click on the desktop) and type
'sudo chmod a+rwx /dev/lp???' (lp0, lp1, maybe lp2 - you can guess or check the usb folder) -
it will ask you for a password (our regular user account passwords match the computer names)
and again, check the dev folder for the correct port if you can't connect. This shouldn't be necessary, but changes to these permissions
settings have not always stuck with restarts, so you may have to do this occasionally.
 5. -
5. - Once everything is ready (is your size correct? check dimensions where dpi is located), click "calculate" in Mods - this creates a toolpath from the edges of your black & white image. Until you click on
"calculate", the print button will say "waiting for file".
6. - Send file to printer - assuming connection is good, the vinyl cutter will immediately begin to cut. When the cut is finished, use the jog (arrow)
buttons on the machine to bring the sheet out so you can carefully cut your part away from the roll with scissors or a utility knife.
Now you have a choice - you can weed the waste vinyl first, or apply masking film first, and then weed the waste vinyl off the masking afterwards.
We've had more success weeding first. Try both. Carefully peel waste vinyl away - have a pointy tool like an X-acto knife or utility knife to help keep
corners down and separate other spots where the vinyl resists peeling away cleanly. Pull to the side, rather than up/perpendicular to sheet.
If the sheet is large, expect so cut up and separate waste vinyl in patches, rather than trying to pull it all off in one giant lump.
If your image, or parts of it, are very small, expect weeding to be difficult - the small parts will want to slide around on the waxy backing, or lift off
entirely. Expect to possibly test a failure and make changes for cutting another piece.
The masking film is just a big roll of low-tack masking tape. It is not as sticky as regular masking tape - it works well for vinyl transfer, but
is no good for use as regular tape. Please only use it for vinyl transfer. We need to keep it safe in the back corner of the soldering station area
as it gets abused when non-vinyl-cutting people think it will work like regular masking tape. Remember to cut a clean edge every time, don't
just rip off pieces - and put it back in the corner when it's not in use.
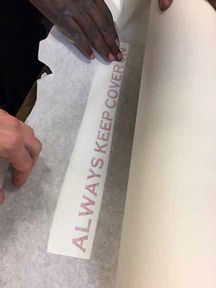
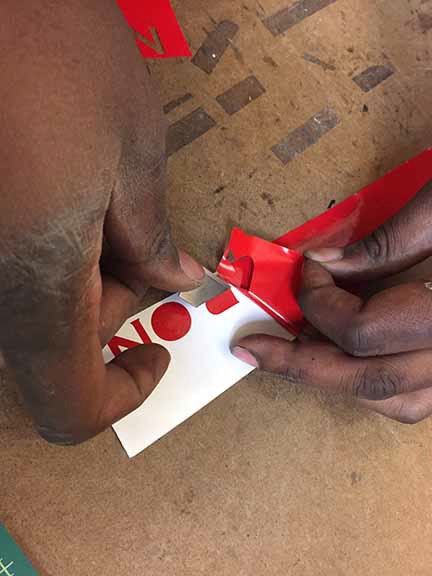
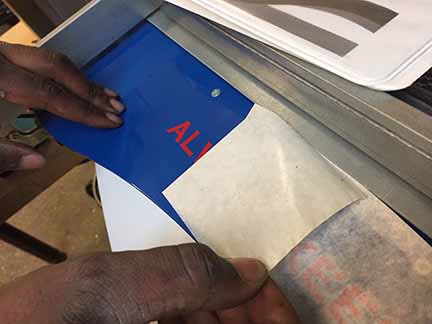
In this photo, we've weeded first, and are applying the masking film to the vinyl letters, which are still on their backing.
Unroll the masking film very carefully, and cut it cleanly - it's thin and will rip easily. It's very difficult to handle when the edge is ripped and
uneven, so try to keep the edges cut clean at all times.
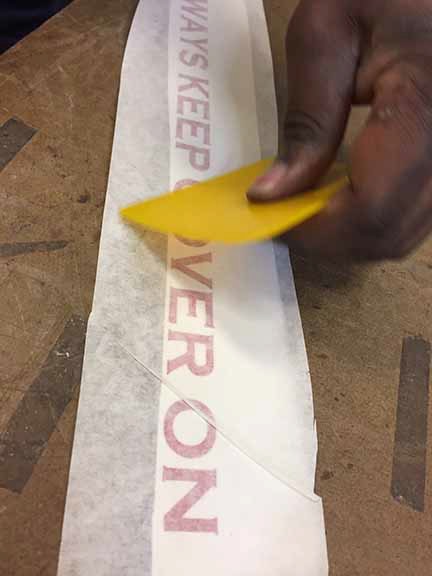
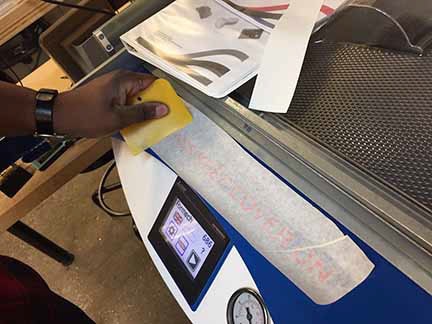
Use a squeegee to thoroughly press the film to your vinyl - try to keep the film flat and unwrinkled as much as possible (see photo) to reduce the
chance of shifting, wrinkling, or distortion of layout of the vinyl bits of your image. A few plastic squeegees should be kept under the computer
monitor shelf at the vinyl cutter, along with the paper copy of the machine manual.
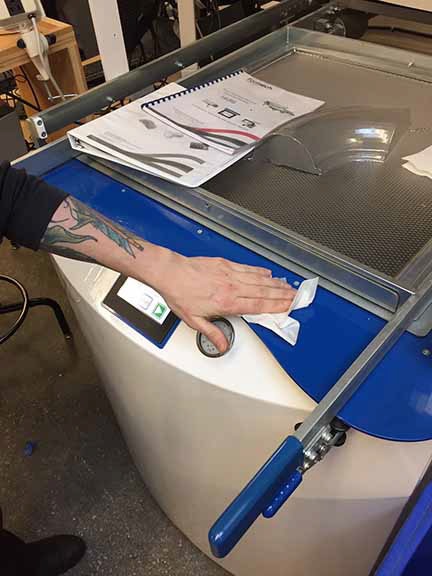
Just before applying vinyl, clean off the surface you want to stick it to with rubbing alcohol and a clean paper towel. You need to remove all dust, oil,
lint, and any other gunk that might be on the surface for the vinyl's adhesive to have any chance of sticking.
Some surfaces will take the vinyl adhesive better than others - sometimes this might mean buying specialty material, depending on what you intend to
stick it to. Expect textured or flexible surfaces to work poorly in this regard.
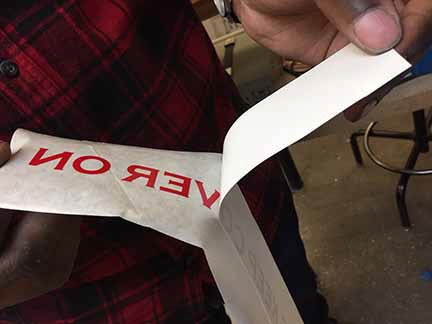
Carefully apply the image and use the squeegee again, to press the vinyl with the backing to the surface as hard as possible - when done, pull the backing carefully sideways,
again, to remove it without pulling the vinyl away.
If the vinyl starts to peel away, carefully back the film onto the surface again, and try squeegeeing that particular area even harder to get it to stick.
Below are some images from testing the standard stock, and thicker silicone sheet for sand blasting.
We'd recommend getting a solid amount of practice with plain vinyl cutting before attempting more specialized projects like this.
The standard vinyl disintegrated almost immediately in the sand blaster.

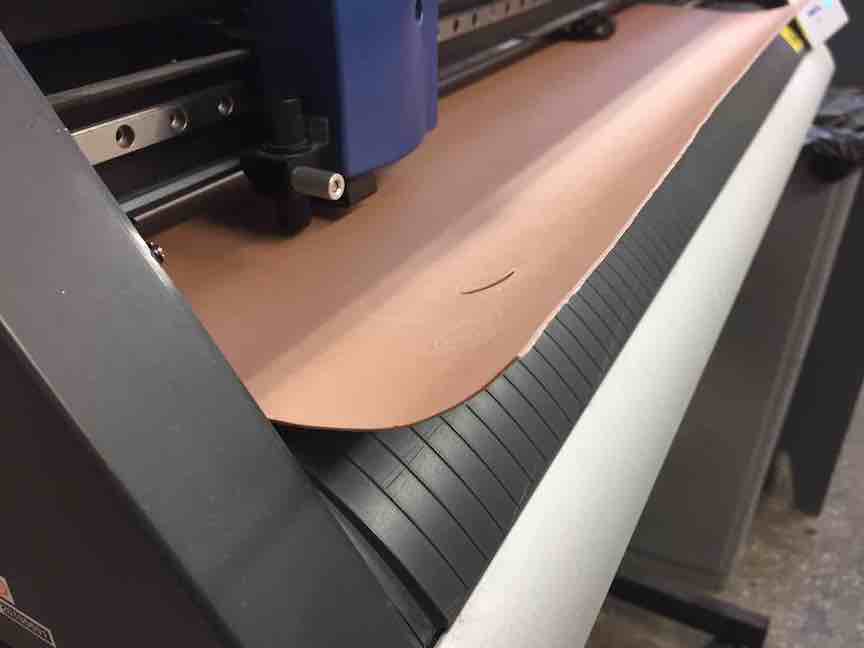
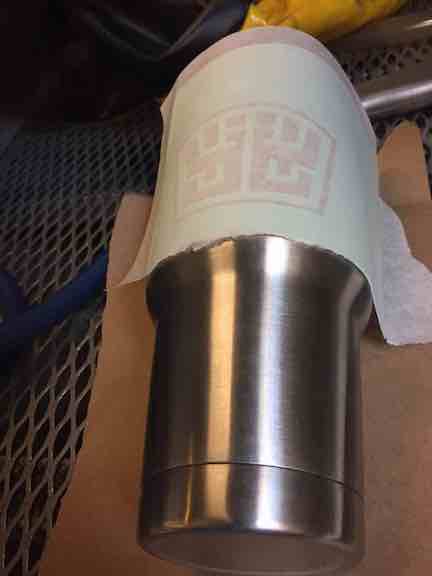
Oddly, the silicone is rolled in the opposite direction relative to all our other vinyl - this curve up in the Roland caused the light sensor
underneath to interrupt the job. I had to hold it down so that the machine could more accurately sense the edge of the material.
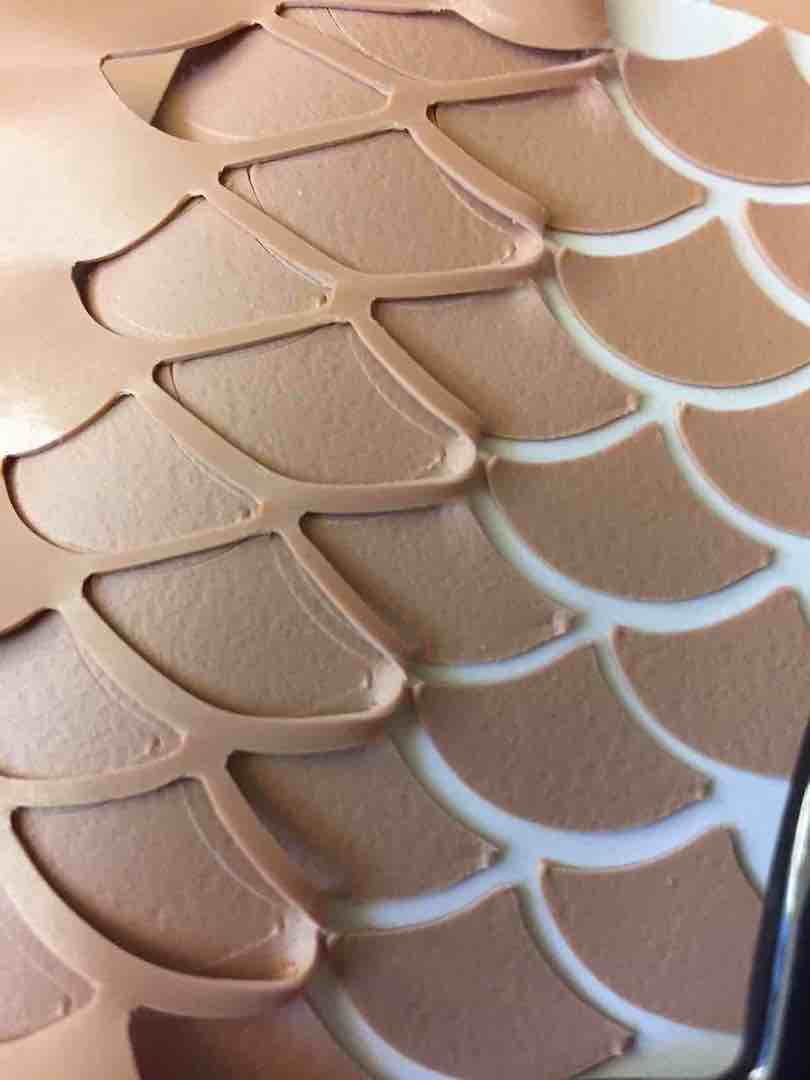
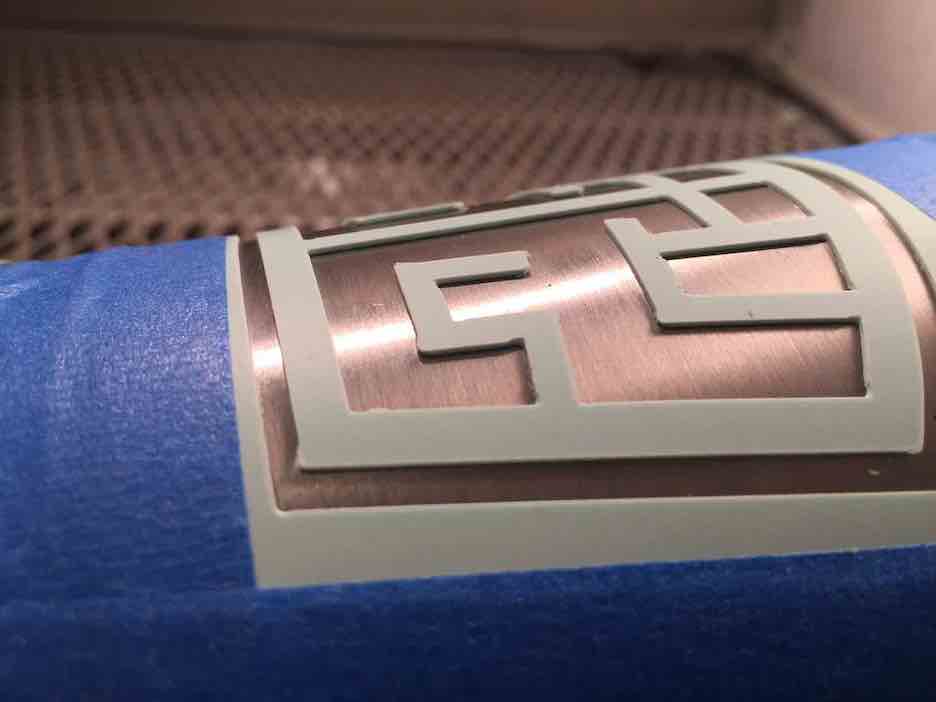
The settings test on the Roland shows the curved shape left behind by the drag knife trying to turn square corners in thick material fairly well.
Here's another closeup of the corners before weeding.
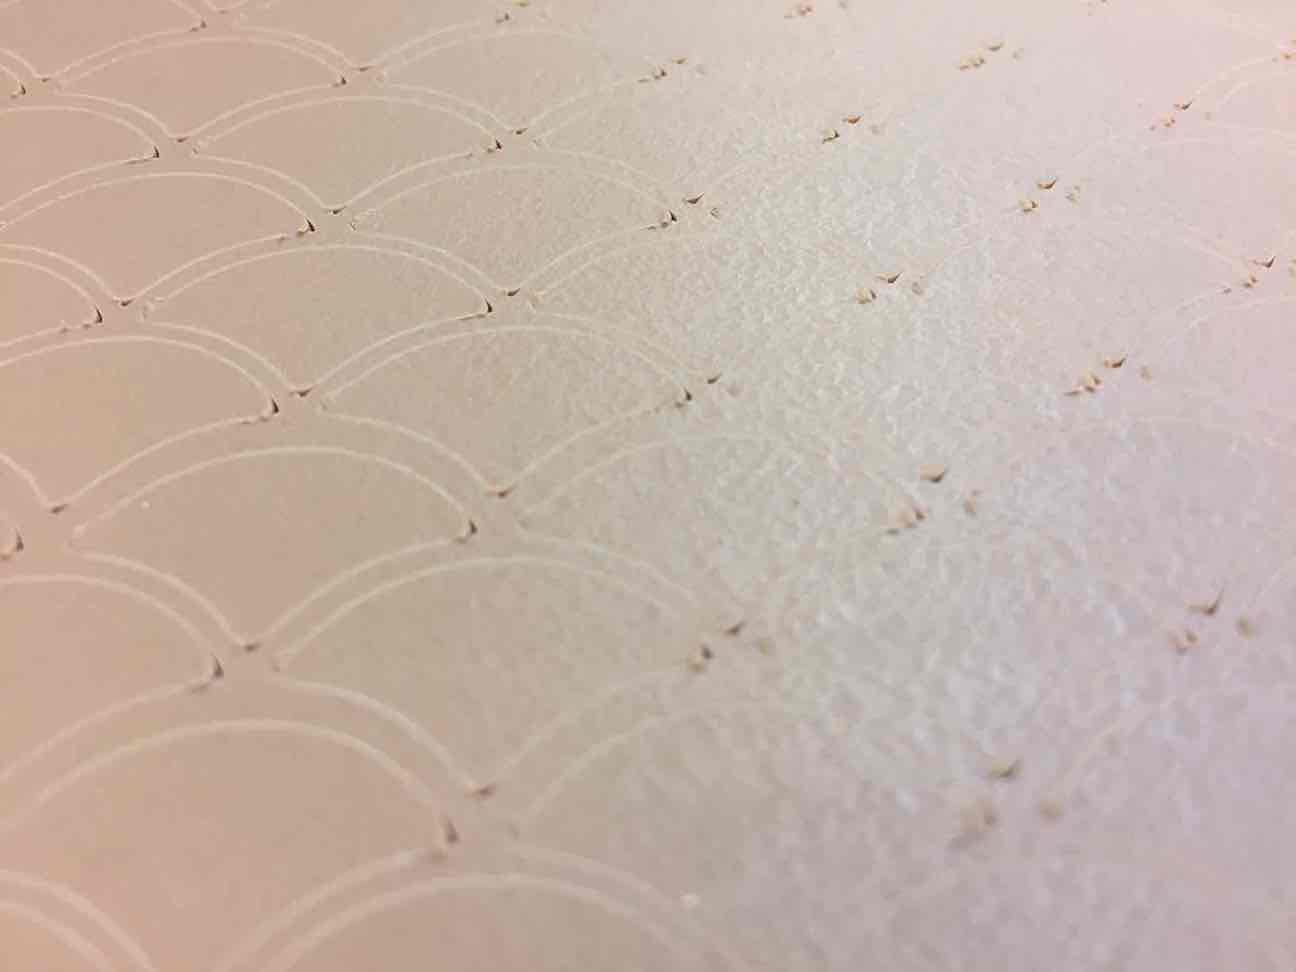
Like other vinyl, weeding to leave behind small islands of material can be a little difficult- each island is more likely to shift
during weeding if it isn't sticking well, and gets pulled/nudged during weeding.
I did a couple of tests to check the sandblasted surface quality on glass, as well as on the silicone masking.
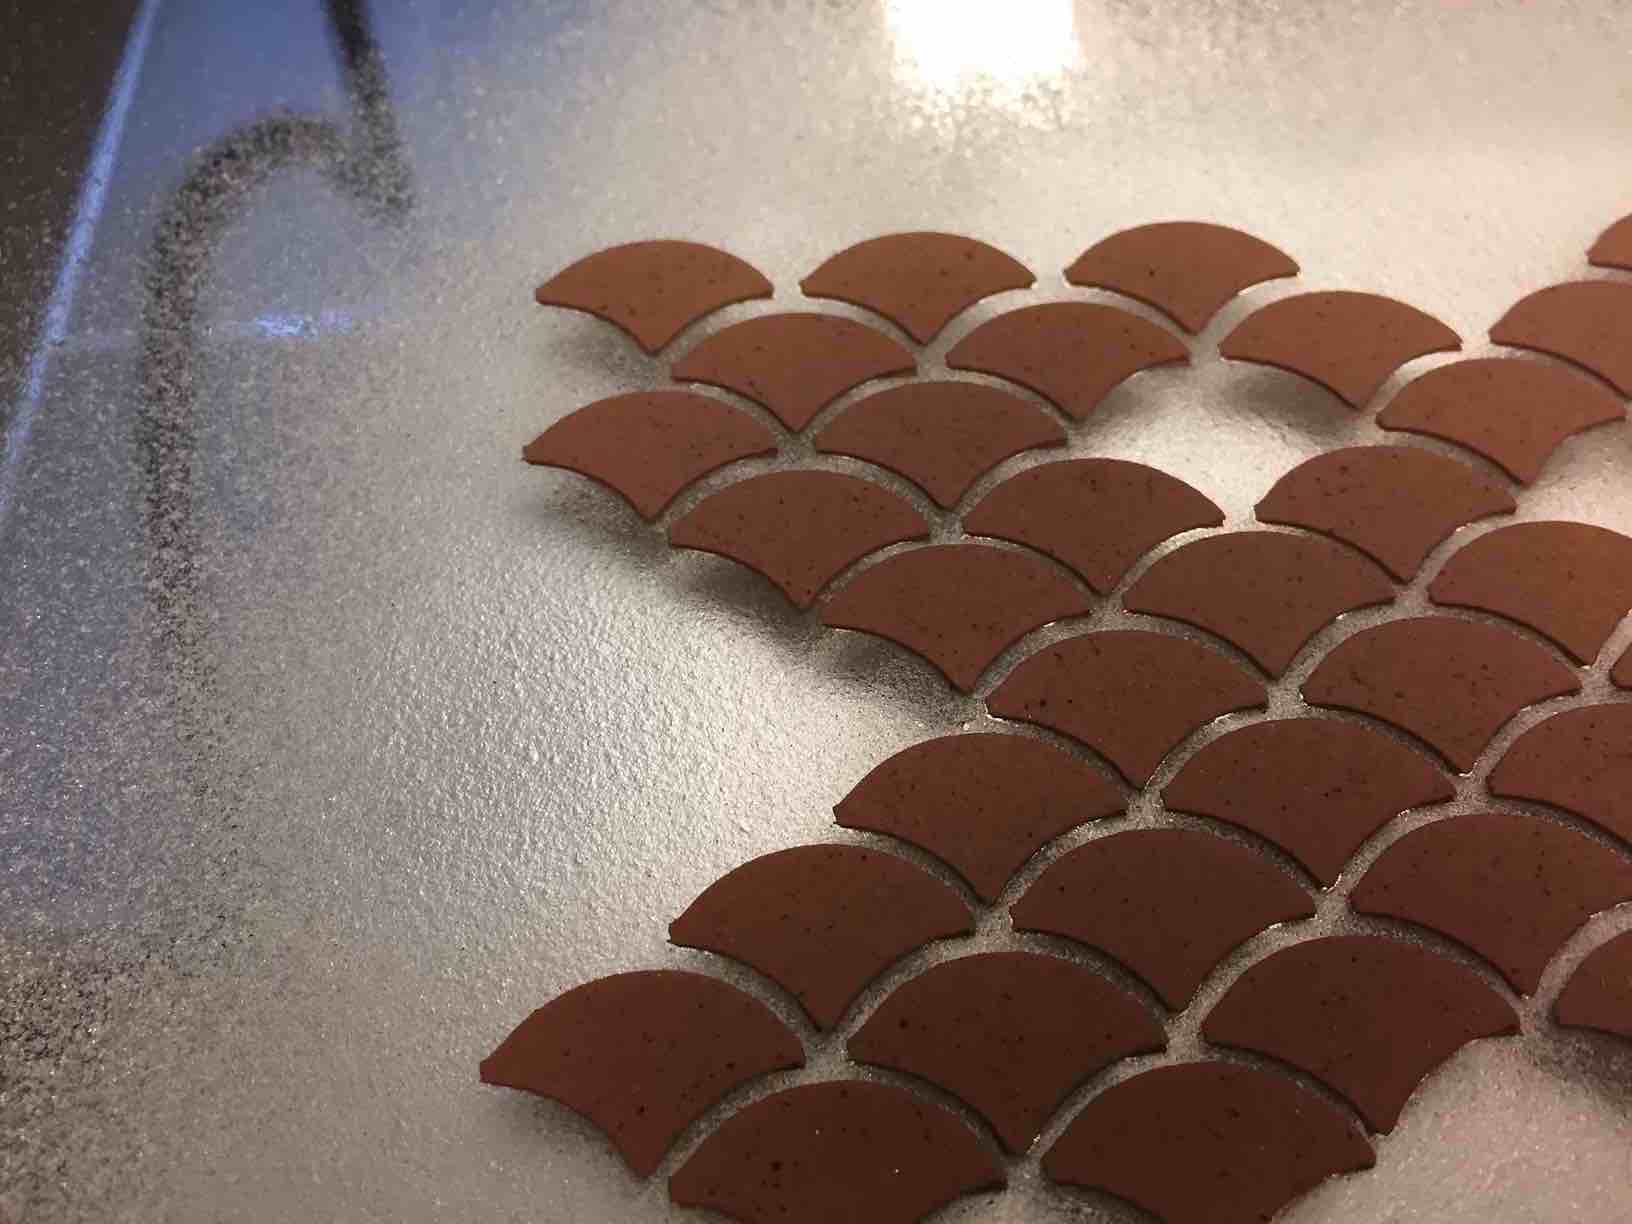
The matte surface is not super smooth - but we're using a pretty low grit of abrasive, which will affect that.
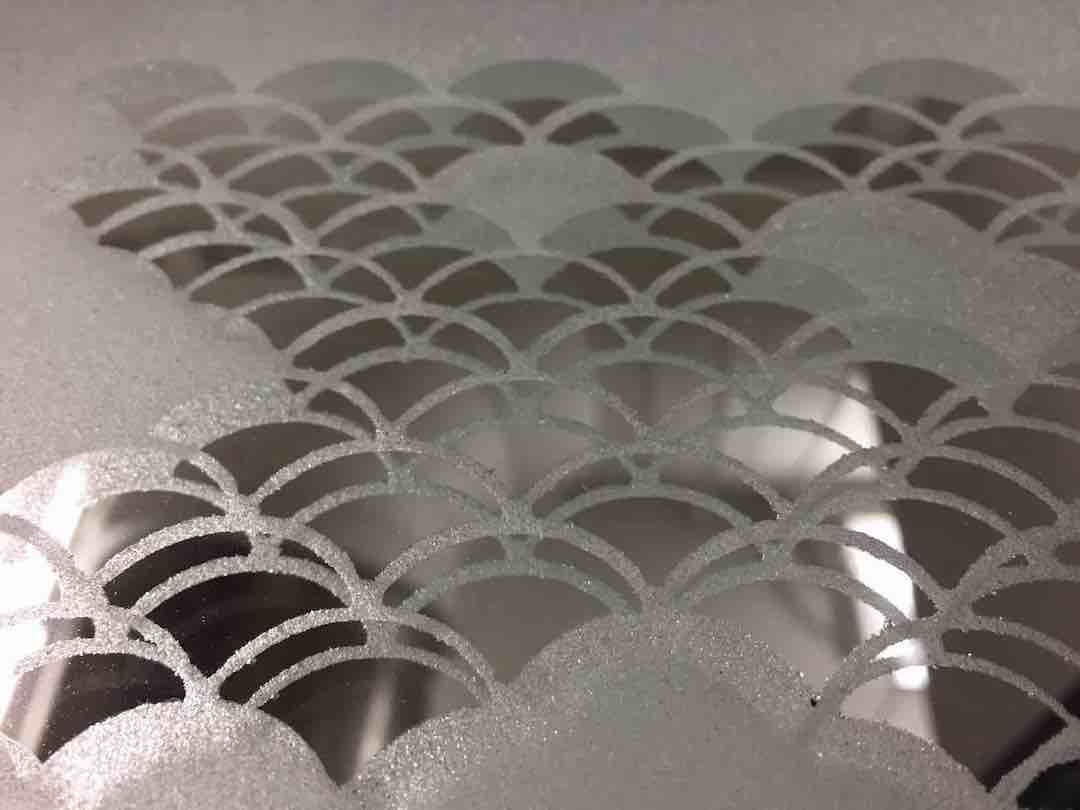
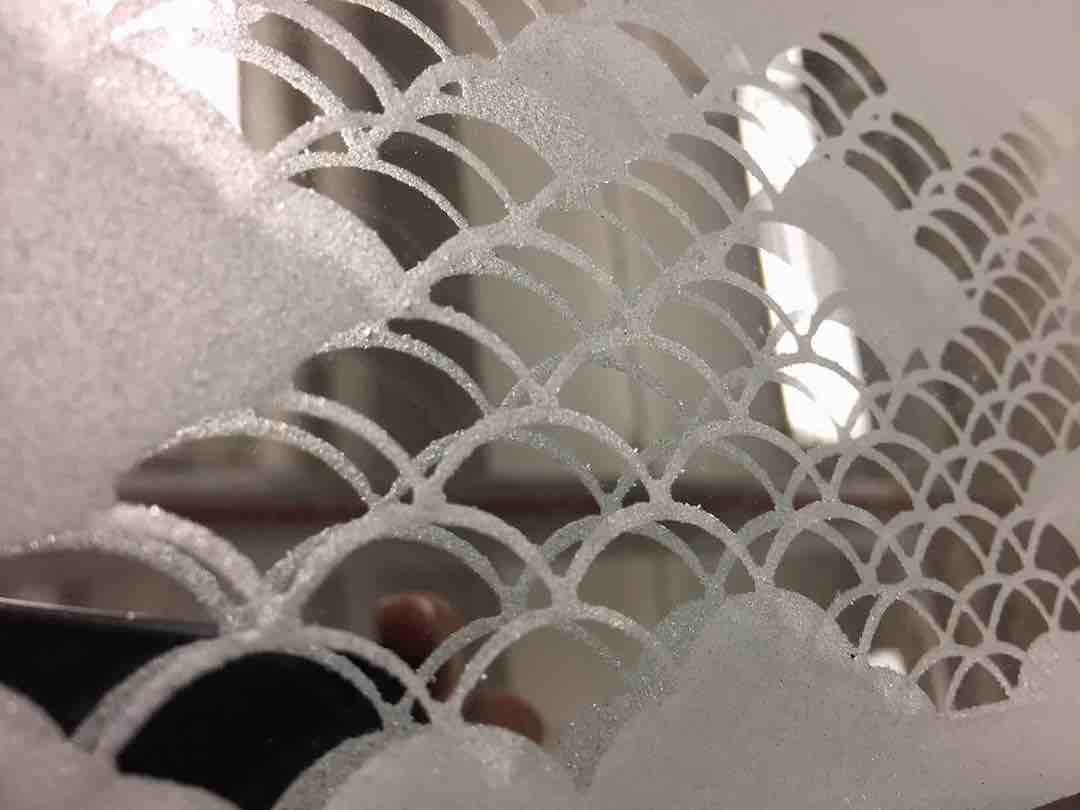
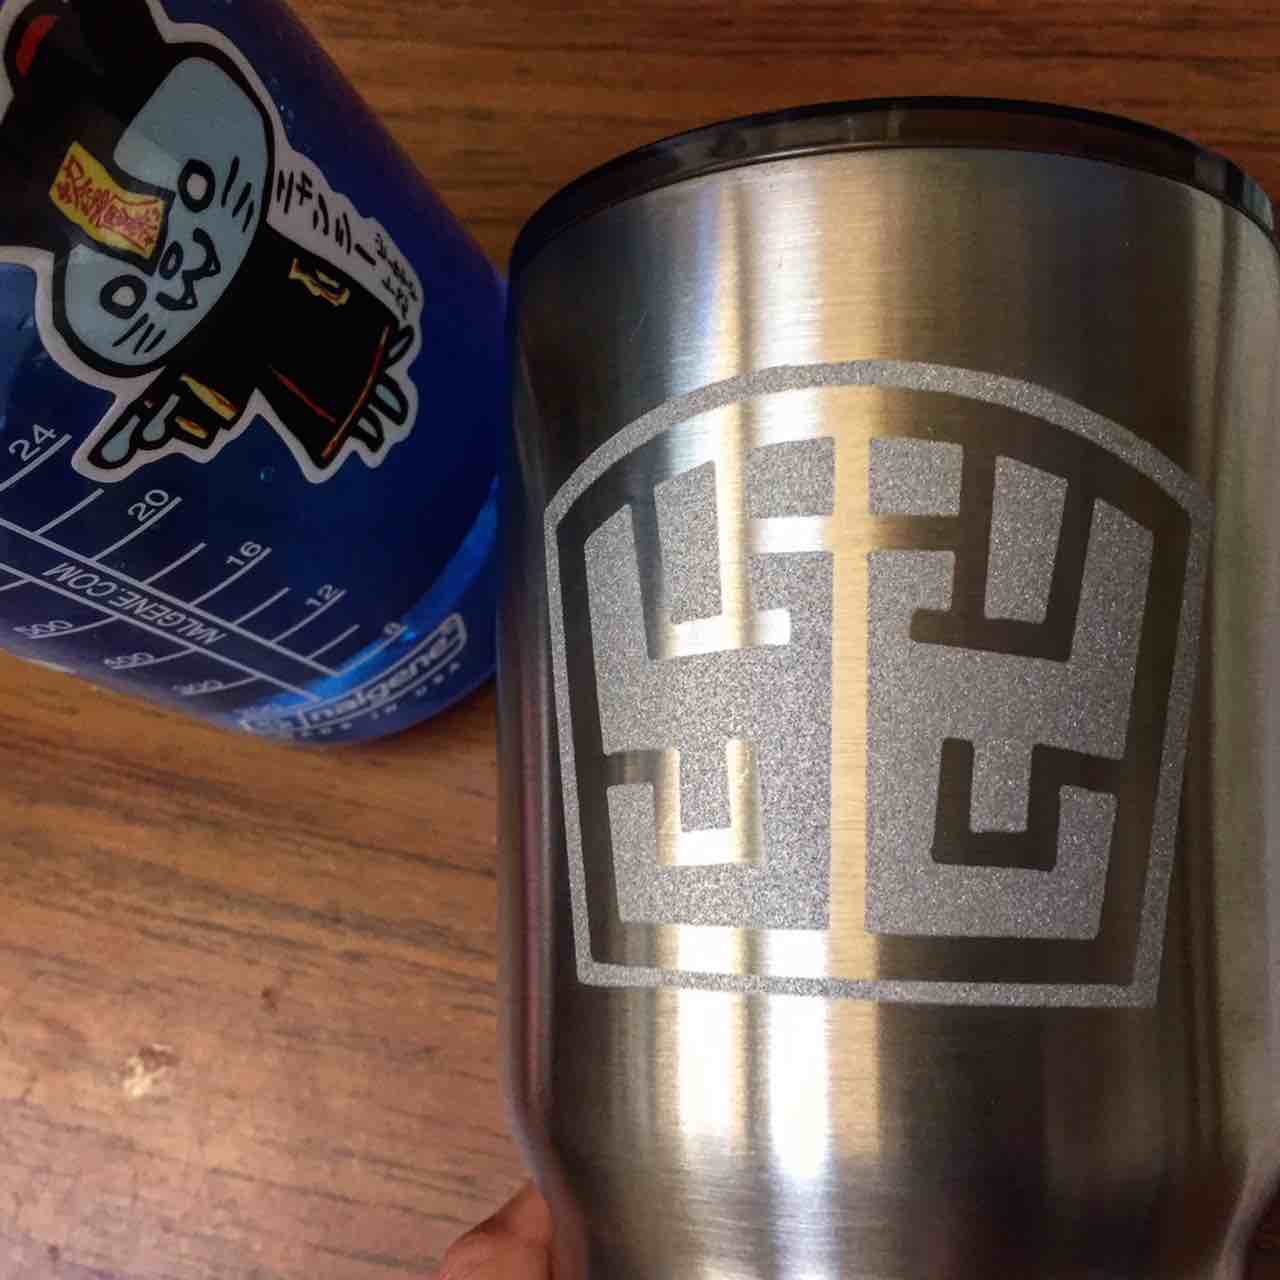
A real-life test on my thermos looked messy in the masking stencil, but the slightly fuzzy edges and messy corners aren't really
noticeable in the results, even at this scale.
 RESERVATIONS
 HOURS
HOURS TUTORIALS