Soldering (surface mount copper PCB)
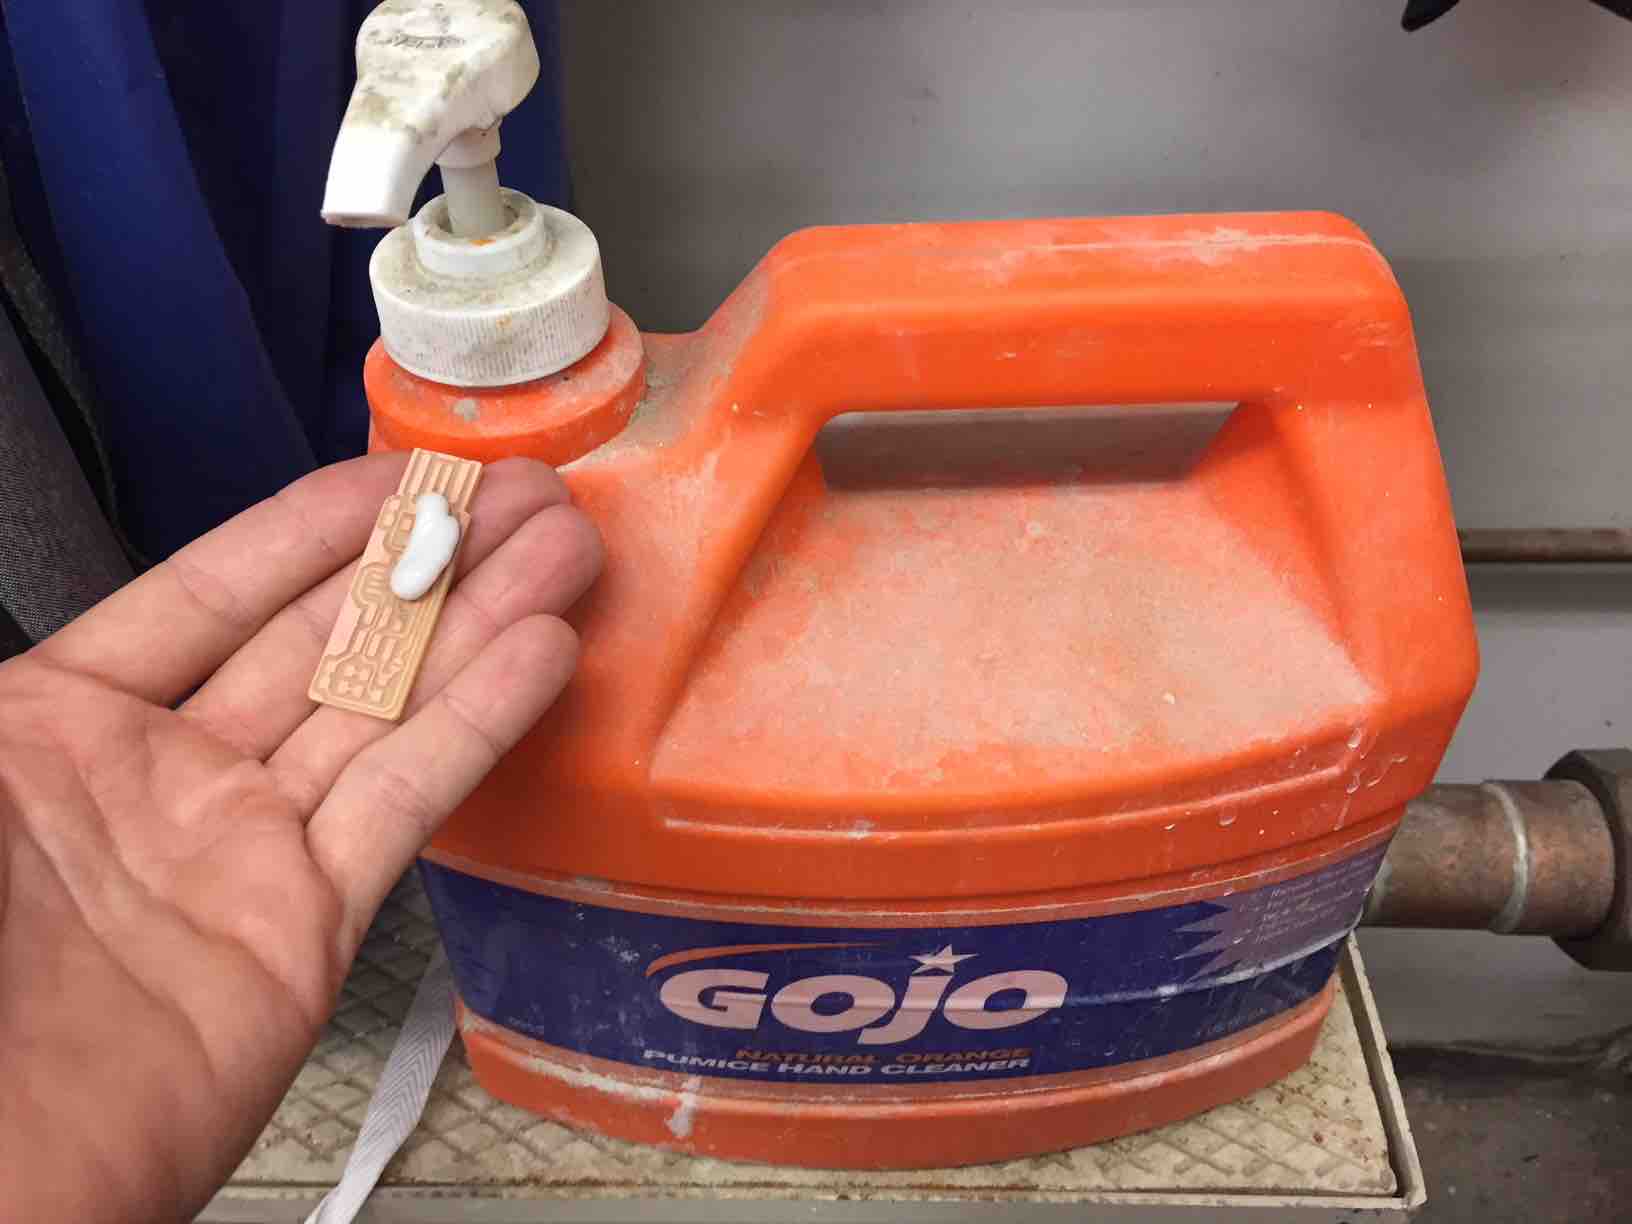
The copper surfaces must be cleaned immediately before soldering for good results - we've found that the
pumice soap by the sink in 3-402 works really well for this. Rub a bit in, dry (no water) for 20-30 seconds,
rinse and dry thoroughly, and bring back into 3-402A to solder immediately. You should have no trouble getting
solder to flow easily if you have just cleaned the board.
Please always work under the magnifying lamps! Even with good eyesight, you can't really tell whether your
solder flowed properly onto the pads and the parts' feet without magnification.
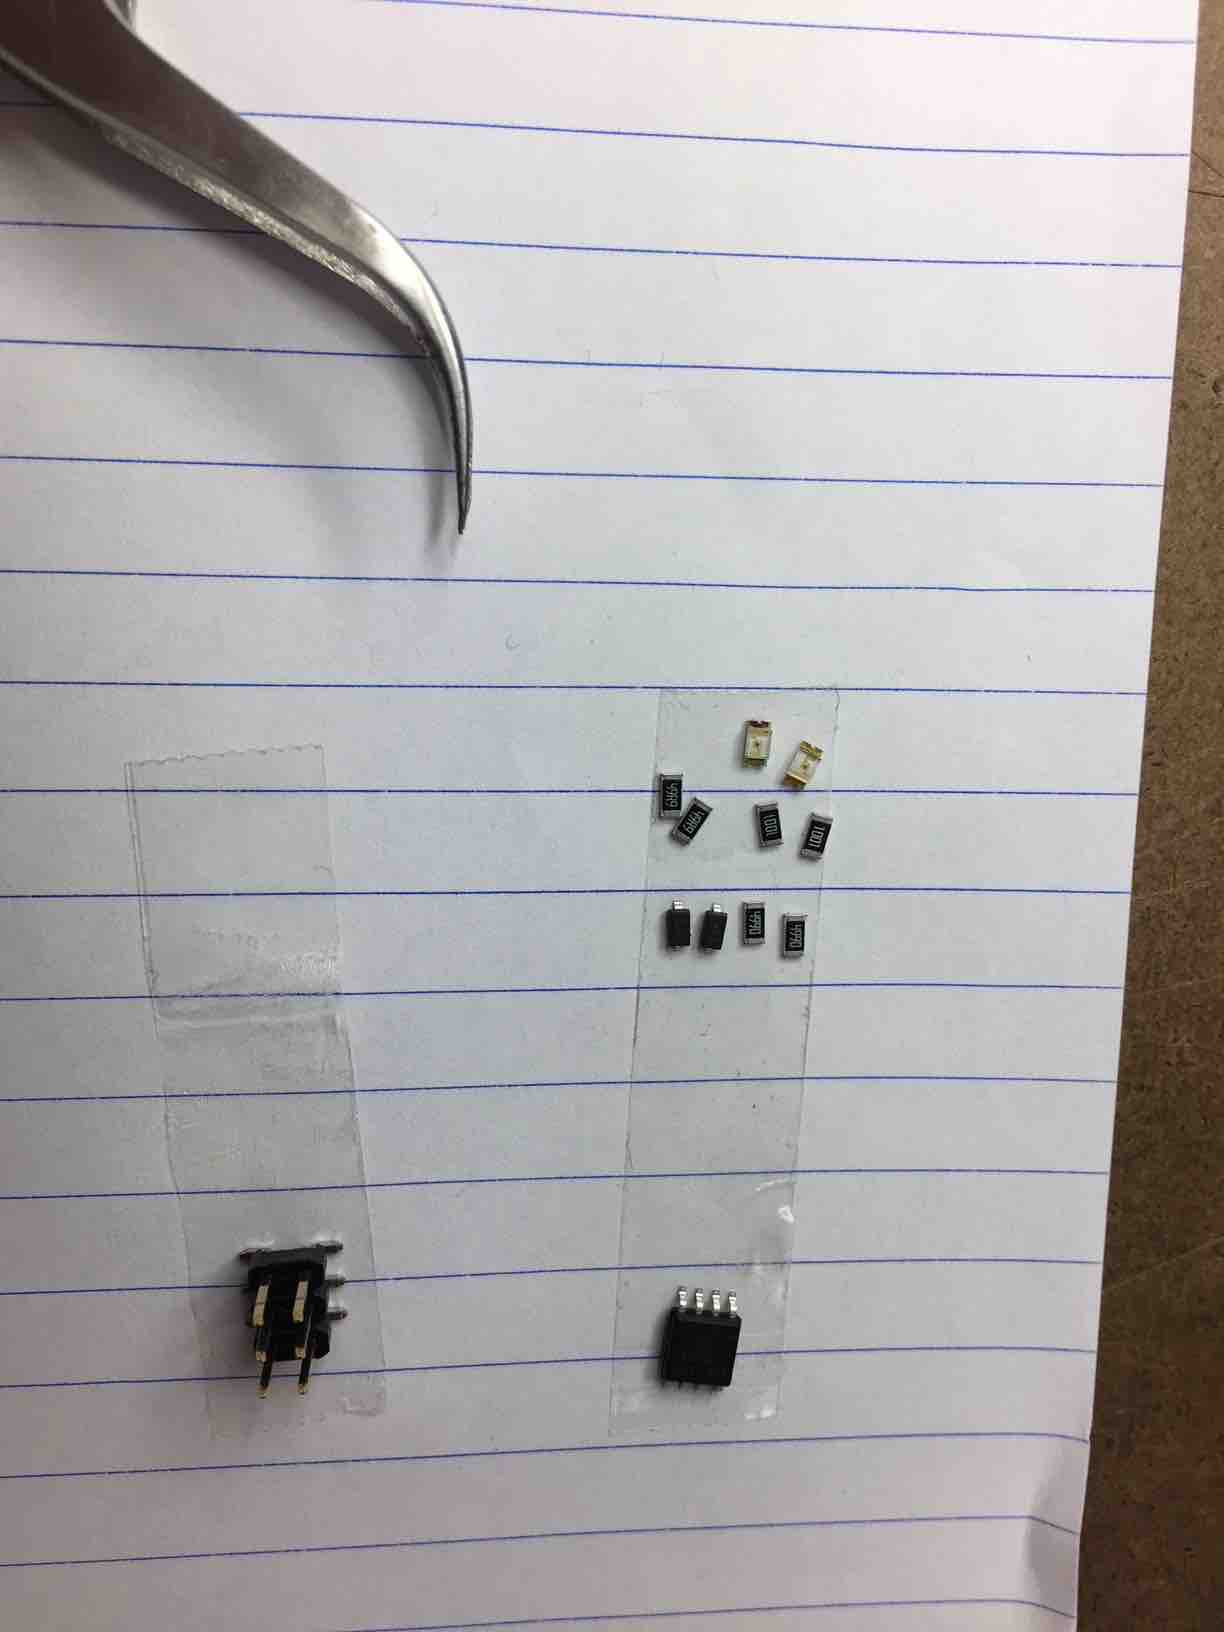
For more comfortable and organized soldering, carefully collect just the parts you need, and place them on a bit of
DS tape on a piece of cardboard or paper.
Always keep part boxes in their
correct place and closed at all times -do NOT take out extra parts, or ever leave
part boxes or part tapes out on the table - they are tiny and become impossible to sort once they're out of
organization!).
You'll want to rotate your board repeatedly while soldering - taping the board as well as the
parts to a piece of paper or cardboard, as in the image, makes it much easier to keep everything you need directly
contained and under the magnifying lamp.
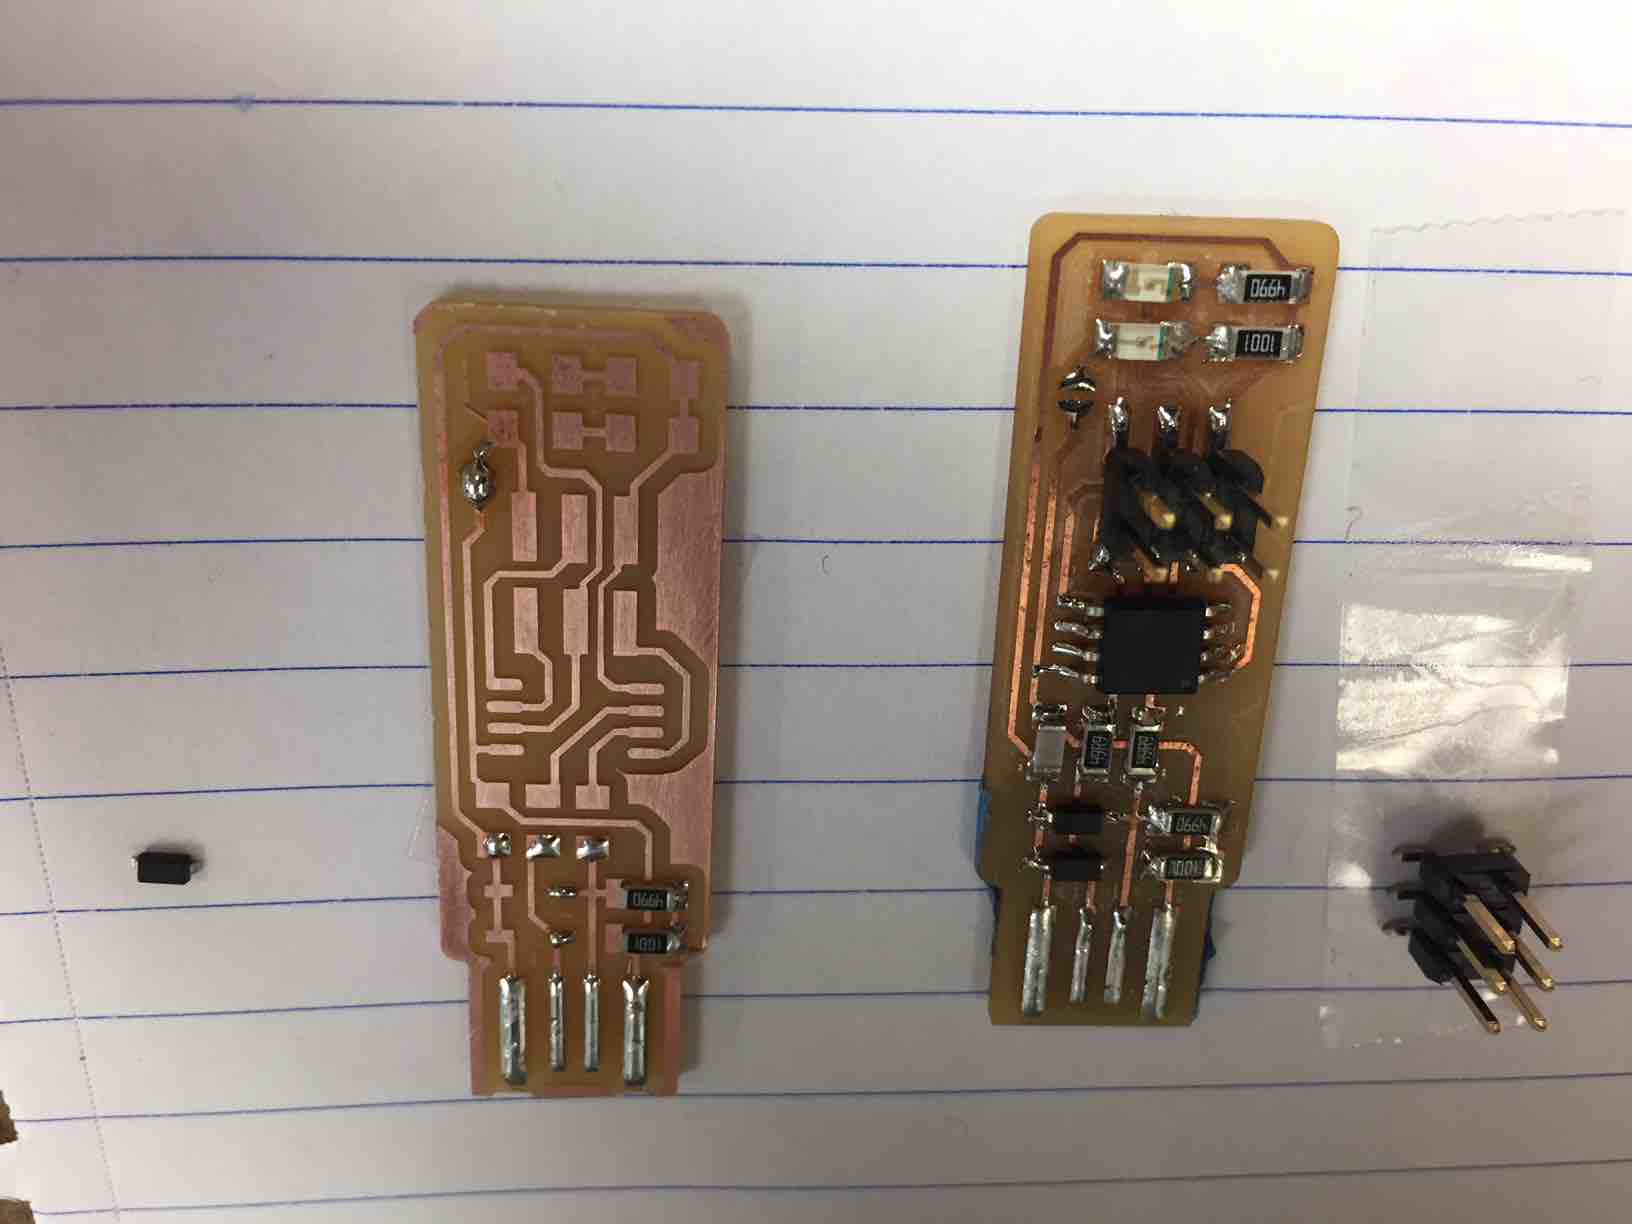
Any loose parts not tacked down are extremely easy to lose, especially while you're wrangling a soldering
iron, tweezers, and solder wire under the lamp all at the same time. Please use this method to keep things
under control. You'll get your work done much faster this way, as well.
Use the tip cleaner as frequently as possible to keep the iron tip clean - solder must always be able to flow
easily on this surface as well as on the copper board.
You must always solder right up against a fume extractor - it will need to be almost bumped up against the
magnifying lamp to be effective - another reason to keep all your parts contained on a bit of cardboard for
easy access. The gray fume extractors have small power switches at the bottom on the front - they're noisy, but
not as noisy as the laser cutters - so please check them when you're done and make sure they're turned off
after use.
We use both lead-free and lead-based solder in 3-402A -
make sure you are not eating/drinking while doing this work, and wash
your hands thoroughly when you are done.
If solder is not flowing well, do not overcrank the temperature! The iron tip needs to be clean/tinned, and the board
needs to be freshly scrubbed off to ensure good flow. Trying to compensate by overheating will not help with flow. It will,
however, cause melting and burning.
It is recommended to work at 600-650℉ (316-343℃) for lead-based solder, and 650-700℉ (343-371℃) for
lead-free solder. If you're having trouble getting solder to flow, make sure your board and iron tip are both
freshly cleaned.
Note that there is a window of individual preference for temperature range - a slightly lower temperature will take a bit longer to flow,
but also freezes again faster, and is a little less likely to overheat the substrate. Higher temperatures will flow faster, but also increase
risk of overheating substrate- and freezing takes longer. If you are holding a part down with tweezers to tack it, you have to remember to
not let go for another second while waiting for the solder to solidify again. Small but obnoxious detail.
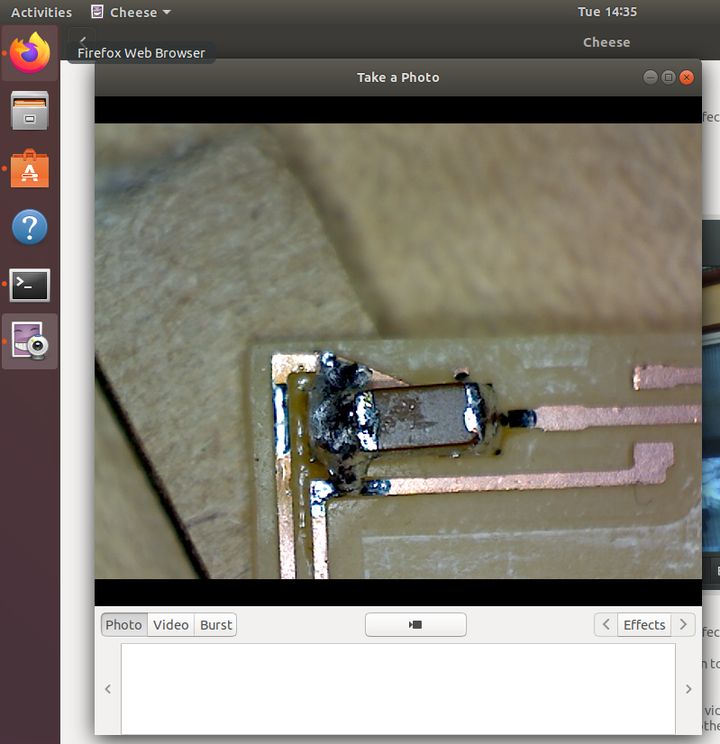
You should always work under a lit magnifying glass, but we also have a Celestron USB microscope at the computer station in the
corner with the Modelas.
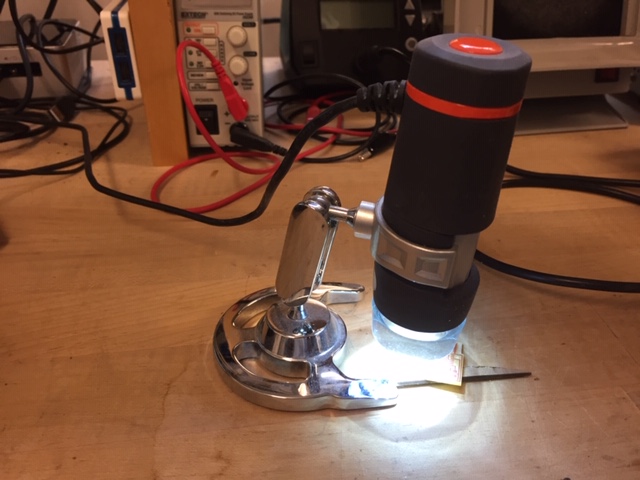
It can be useful for checking on hard-to-see details, even under the magnifying lights.
Use the "Cheese" app, and make sure the device is plugged in (it will light up).
Push the button on the top of the microscope
to take photos.
 RESERVATIONS
 HOURS
HOURS TUTORIALS